
Getting your Project Management Professional Certification (PMP®) from the Project Management Institute (PMI®) is no small feat. In order to test for the PMP® certification, PMI® requires you to first apply on their website. While PMI® discounts the exam for members, this article does not make any distinction between those that are members, and those that are not.
Let’s start by navigating to the PMI® website. Open any web browser and navigate to www.pmi.org to get started. From here, we’ll walk through the process of registering an account and applying to take the test using a series of screenshots.
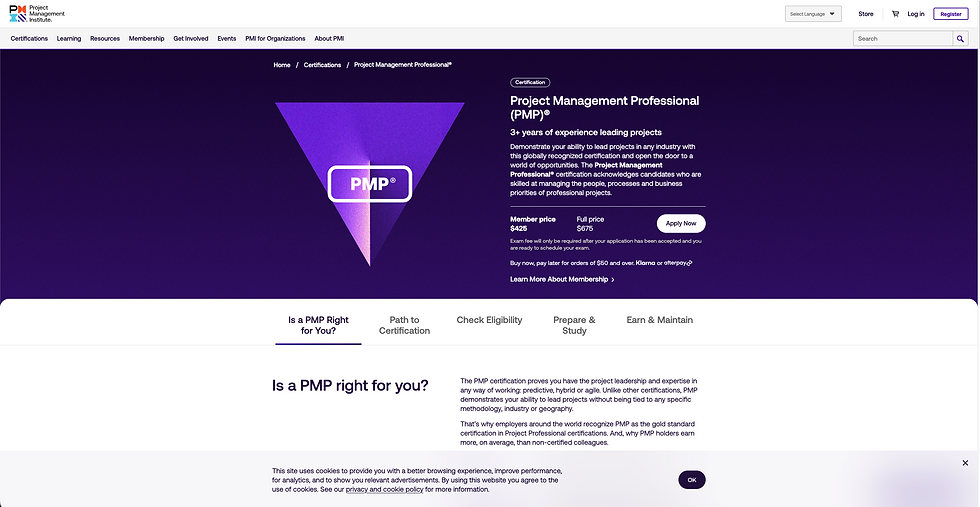
Step 1. Click on the Certifications tab, and when the sub-menu appears, select Project Management Professional (PMP®) from the available certification types.

Step 2. On the far right side of the web page, select the Apply Now button.
Step 3. Create a free account or log in and skip to Step 6

Step 4. Enter your Personal Information

Step 5. Log in to the PMI® website using your new account credentials.
Step 6. Now that you are logged in, navigate to the PMP® certification section and select Apply Now
Step 7. Now to begin the fun part: applying for the Certification.
-
This process begins with confirming your education.
-
Enter the highest year of education and years of attendance.


Step 8. Enter your professional experience and/or project management experience from the previous 10 years. You may see either Project or Role Summary.

Organization: The name of the organization you were working for (not the customer)
Job Title: Your job title at the time, such as Project Manager – Major Market
Project Dates: Enter the month and year the project started and ended. If the project is still ongoing, you need to select the “Currently in...” box.
Project Description: You must provide a project description of at least 100 words; however, aim for 200-500 words. In this section, you will need to outline your project objective (goal statement), outcome, your role on the project, your responsibilities, and deliverables.
Once you have completed your project description and all other fields, select the Save Experience button. The system will automatically calculate the months for the project you entered. If you have not yet reached the required months, you will see an option to add additional experience. If you have met the required number of months, you will move on to the professional training section.

Step 9. Review your application thoroughly.
.jpg)
NOTE: Your name on your application and your identification MUST MATCH ON EXAM DAY! Do not just guess. Pull out your ID and make sure it is correct, or you will be turned away by the proctor/check-in person on exam day!
If you need any exam accommodations (cases where accommodations are made are listed at this website), select “Yes.” Otherwise, select “No.” Review the terms and agreements at the hyperlink and select the agreement box.

Step 10. The last step! Click Submit Application. This sends your application to PMI and no changes can be made to the application.
This entire process can be daunting and frustrating if you aren’t prepared for it. Hopefully, this will prepare you for all the items you need to have ready before you begin reducing that frustration. If you still need help along the way or if you are still looking for training for the final piece of your puzzle, don’t hesitate to reach out to the great team here at PM-ProLearn to help achieve your PMP® goals. Just fill out the form below to connect with an advisor.

How To Apply For The PMP® Exam
A Step-By-Step Guide With Screen Shots